If you love beer, you probably know the difference between drinking it from a bottle or a can and drinking it from a tap. There’s something about the freshness, the carbonation, and the flavor of draft beer that makes it more satisfying and enjoyable.
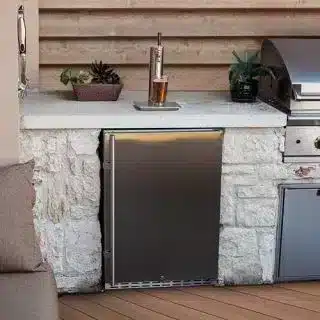
But what if you could have draft beer at home, anytime you want? What if you could turn your mini fridge into a kegerator, a device that dispenses cold beer from a keg?
Sounds awesome, right? Well, it’s not only awesome, but also possible. With some tools, some supplies, and some DIY skills, you can transform your mini fridge into a kegerator and enjoy your favorite brews on tap.
In this post, we’ll show you how to do it. We’ll explain what a kegerator is, why you need one, and how to make one out of a mini fridge. We’ll also share some tips on how to use and maintain your kegerator. Let’s get started!
A mini fridge can be turned into a kegerator by installing a keg coupler, a tap, and some tubing inside it. You’ll also need to drill some holes in the mini fridge for the tubing and the CO2 tank.
What is a Kegerator and Why Do You Need One?
A kegerator is a refrigerator that holds and dispenses beer from a keg. A keg is a metal container that stores beer under pressure. A keg can hold different amounts of beer depending on its size and type. For example, a standard half-barrel keg can hold 15.5 gallons of beer, while a mini or pony keg can hold 5 gallons of beer.
A kegerator has four main components:
- A keg coupler, which connects the beer line to the keg.
- A tap, which allows you to pour beer into a glass.
- A CO2 tank, which provides carbon dioxide gas to pressurize and push the beer through the line.
- A regulator, which controls the amount of CO2 gas that goes into the keg.
A kegerator keeps the beer cold and fresh for longer than a bottle or a can. It also allows you to enjoy draft beer at home, without having to go to a bar or a brewery. You can choose from different kinds of beer, from lagers to stouts, and serve them at the optimal temperature and carbonation level.
A kegerator is perfect for parties, gatherings, or just relaxing at home with your favorite brew. It’s also more economical and eco-friendly than buying individual bottles or cans of beer. You can save money by buying in bulk and reduce waste by reusing the same keg.

How to Turn Your Mini Fridge Into a Kegerator
Turning your mini fridge into a kegerator is not very difficult, but it does require some tools, some supplies, and some DIY skills. Here are the steps you need to follow:
- Pick a mini fridge that works. You need to choose a mini fridge that is big enough to fit your keg and your CO2 tank inside. You also need to make sure that your mini fridge is working properly and has no leaks or damages.
- Find a kegerator conversion kit. You need to buy or order a kegerator conversion kit that matches your mini fridge and your keg size and type. A conversion kit typically includes a keg coupler, a tap, a CO2 tank, a regulator, some tubing, and some fittings. You can find conversion kits online or in specialty stores.
- Modify your mini fridge. You need to drill some holes in your mini fridge for the tubing and the CO2 tank. You also need to clean your mini fridge and remove any shelves or drawers that might get in the way of your keg or your CO2 tank.
- Install the coupler. You need to attach the coupler to the top of your keg by aligning it with the valve and twisting it clockwise until it locks in place. You also need to connect one end of the tubing to the coupler and secure it with a clamp.
- Install the tap. You need to drill another hole in your mini fridge for the tap. You can choose to install it on the top or on the front of your mini fridge, depending on your preference and convenience. You also need to connect the other end of the tubing to the tap and secure it with another clamp.
- Install the CO2 tank. You need to drill another hole in your mini fridge for the CO2 tank. You can choose to place it inside or outside your mini fridge, depending on the space and the aesthetics. You also need to connect the CO2 tank to the regulator and the regulator to the coupler with some more tubing and clamps.
- Test your kegerator. You need to turn on your mini fridge and let it cool down for a few hours. You also need to turn on your CO2 tank and adjust your regulator to the desired pressure level, usually between 10 and 12 psi. You also need to check for any leaks or kinks in your tubing and fix them if necessary.
- Enjoy your beer. You need to open your tap and pour yourself a glass of beer. You may need to let some foam out first until you get a clear stream of beer. You also need to keep an eye on your CO2 tank level and refill it when it runs low.

How to Use and Maintain Your Kegerator
Using and maintaining your kegerator is not very hard, but it does require some care and attention. Here are some tips you need to follow:
- Clean your kegerator regularly. You need to clean your kegerator every time you change your keg or every few months, whichever comes first. You need to use a cleaning kit that includes a cleaning solution, a faucet brush, and a faucet wrench. You need to flush your tubing and your tap with the cleaning solution and rinse them with water. You also need to wipe down your mini fridge and your CO2 tank with a damp cloth.
- Store your kegerator properly. You need to store your kegerator in a cool and dry place, away from direct sunlight or heat sources. You also need to unplug your mini fridge and turn off your CO2 tank when not in use. You also need to cover your tap with a faucet cap or a plastic bag to prevent dust or insects from getting in.
- Troubleshoot your kegerator. You may encounter some problems with your kegerator, such as flat beer, foamy beer, or leaky tubing. These problems can be caused by various factors, such as low CO2 pressure, high temperature, dirty tubing, or loose fittings. You need to identify the cause of the problem and fix it accordingly.

FAQs
Here are some common questions and answers about mini fridges and kegerators:
- How much does it cost to turn a mini fridge into a kegerator? It depends on the cost of your mini fridge, your keg, and your conversion kit, but generally, it can cost anywhere from $200 to $500 to turn a mini fridge into a kegerator. This is cheaper than buying a ready-made kegerator, which can cost anywhere from $500 to $1,000 or more.
- How long does a keg last in a kegerator? It depends on the size of your keg, the type of beer, and how often you drink it, but generally, a keg can last from 2 weeks to 6 months in a kegerator. The fresher the beer, the better it tastes, so you should try to finish your keg within a reasonable time frame.
- What are the benefits of turning a mini fridge into a kegerator? There are many benefits of turning a mini fridge into a kegerator, such as:
- Saving money by buying beer in bulk
- Reducing waste by reusing the same keg
- Enjoying fresh and cold draft beer at home
- Having fun and being creative with your DIY project