- Online retailers offer competitive prices and reviews, a wider range of parts and models, convenience and accessibility, but they may deliver counterfeit or incompatible parts, charge extra for shipping and handling fees, or have poor customer service and return policies.
- Directly from Whirlpool offers the best quality and performance, discounts and promotions, product registration and support, but they may charge more than other sources due to retail price and shipping costs.
To order directly from Whirlpool, you can visit their Parts & Accessories page on their website. There, you can enter your model number or part number in the search box. Alternatively, you can call their customer service number at 1-866-698-2538.
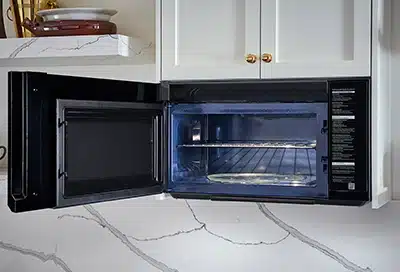
How to Change the Cavity Light
Now that you have your new light bulb for your Whirlpool microwave, you need to know how to change it. We’ll start with the cavity light, which is the one that illuminates the inside of your microwave.
Here are the steps to follow to change the cavity light in your Whirlpool microwave:
- Unplug your microwave from the power source. This is a safety precaution to avoid electric shock or damage to your microwave.
- Locate the cover or bulb holder of the cavity light. Depending on your microwave model, it may be on the top, side, or back of the microwave. You may need to remove some screws or clips to access it.
- Remove the cover or bulb holder of the cavity light. You may need to pull, slide, or lift it off depending on how it’s attached. Be careful not to break any wires or connectors.
- Remove the old bulb from the socket. You may need to twist or pull it out depending on how it’s attached. Be gentle and avoid touching the bulb with your bare hands as it may be hot or sharp.
- Install the new bulb in the socket. You may need to push or twist it in depending on how it’s attached. Make sure it’s aligned and secured properly.
- Reattach the cover or bulb holder of the cavity light. You may need to push, slide, or lower it in depending on how it’s attached. Make sure it’s aligned and secured properly.
- Plug your microwave back into the power source. Test your microwave to see if the cavity light works normally.
How to Change the Surface Light
Next, we’ll move on to the surface light, which is the one that shines under your microwave to provide extra lighting for your cooktop or countertop.
Here are the steps to follow to change the surface light in your Whirlpool microwave:
- Unplug your microwave from the power source. This is a safety precaution to avoid electric shock or damage to your microwave.
- Locate the cover or bulb holder of the surface light. Depending on your microwave model, it may be on the bottom or back of the microwave. You may need to remove some screws or clips to access it.
- Remove the cover or bulb holder of the surface light. You may need to pull, slide, or lift it off depending on how it’s attached. Be careful not to break any wires or connectors.
- Remove the old bulb from the socket. You may need to twist or pull it out depending on how it’s attached. Be gentle and avoid touching the bulb with your bare hands as it may be hot or sharp.
- Install the new bulb in the socket. You may need to push or twist it in depending on how it’s attached. Make sure it’s aligned and secured properly.
- Reattach the cover or bulb holder of the surface light. You may need to push, slide, or lower it in depending on how it’s attached. Make sure it’s aligned and secured properly.
- Plug your microwave back into the power source. Test your microwave to see if the surface light works normally.
Frequently Asked Questions
Here are some of the most frequently asked questions about Whirlpool microwaves and their lights:
Q: How do I know if my microwave light is burned out?
A: The easiest way to tell if your microwave light is burned out is by looking at it. If you don’t see any light coming from your microwave when you open the door or when it’s running, then your cavity light is probably burned out. If you don’t see any light coming from under your microwave when you turn on the surface light switch, then your surface light is probably burned out.
Another way to tell if your microwave light is burned out is by testing it with a multimeter. A multimeter is a device that measures electrical voltage, current, and resistance. You can use it to check if your bulb has continuity, which means that electricity can flow through it.
To test your bulb with a multimeter, you need to follow these steps:
- Unplug your microwave from the power source. This is a safety precaution to avoid electric shock or damage to your microwave.
- Remove the bulb from your microwave. You may need to follow the steps we discussed earlier to access and remove the bulb from the cavity or surface light.
- Set your multimeter to the lowest resistance setting. This is usually indicated by the symbol Ω (ohm) on the dial or screen of your multimeter.
- Touch the probes of your multimeter to the metal contacts of your bulb. These are the parts that connect to the socket in your microwave. It doesn’t matter which probe goes where as long as they make contact.
- Read the display of your multimeter. If it shows a low number (close to zero), then your bulb has continuity and is not burned out. If it shows a high number (infinity or OL), then your bulb does not have continuity and is burned out.
If you don’t have a multimeter, you can also try using another bulb that you know works and see if it lights up in your microwave. Just make sure it’s the same type and wattage as your original bulb.
Q: How often should I change my microwave light?
A: There is no definitive answer to how often you should change your microwave light. It depends on how often and how long you use your microwave, as well as the type and quality of your bulb.
Generally speaking, incandescent bulbs last for about 1,000 hours, while LED bulbs last for about 25,000 hours. This means that if you use your microwave for an average of 15 minutes per day, an incandescent bulb may last for about 4 years, while an LED bulb may last for about 100 years.
Of course, these are just estimates and may vary depending on other factors such as power surges, vibrations, humidity, etc. So it’s a good idea to check your microwave light regularly and replace it when it starts to dim, flicker, or burn out.
Q: Can I use any light bulb for my microwave?
A: No, you can’t use any light bulb for your microwave. You need to use a light bulb that is compatible with your microwave model and location. Using the wrong light bulb can cause damage or fire to your microwave or yourself.
As we mentioned earlier, you need to check the type, wattage, and base size of your light bulb before buying a replacement. You can find this information in the manual or the website of Whirlpool, or on the old bulb itself.
You also need to make sure that the light bulb is rated for high temperatures and microwaves. Some light bulbs may not be able to withstand the heat and radiation that microwaves produce. You can look for labels or markings on the bulb that indicate its suitability for microwaves.
Some examples of light bulbs that are compatible with microwaves are:
- Appliance bulbs: These are special bulbs that are designed for appliances such as ovens, refrigerators, and microwaves. They usually have a clear glass and a rugged filament that can resist high temperatures and vibrations.
- LED bulbs: These are energy-efficient bulbs that use a chip instead of a filament to produce light. They usually have a plastic or ceramic casing and a heat sink that can dissipate heat and prevent overheating.
- Halogen bulbs: These are bright bulbs that use a tungsten filament and a halogen gas to produce light. They usually have a quartz glass and a metal base that can handle high temperatures and pressures.
Q: Can I change my microwave light myself?
A: Yes, you can change your microwave light yourself if you have some basic tools and skills. As we showed you earlier, changing your microwave light is not very difficult and can be done in less than 15 minutes.
However, if you’re not confident or comfortable with changing your microwave light yourself, you can always hire a professional technician to do it for you. You can contact Whirlpool or an authorized dealer to schedule a service appointment.
Q: How do I dispose of my old microwave light?
A: How you dispose of your old microwave light depends on what type of bulb it is. Incandescent bulbs can be thrown away in the regular trash, while LED and halogen bulbs need to be recycled properly.
Incandescent bulbs are made of glass and metal that are not harmful to the environment. However, they may break easily and cause injury or damage if not handled carefully. So make sure you wrap them in paper or plastic before throwing them away.
LED and halogen bulbs are made of materials that are harmful to the environment and human health. They contain mercury, lead, and other toxic substances that can leach into the soil and water if not disposed of properly. They also pose a fire hazard if they overheat or break.
Therefore, you need to recycle LED and halogen bulbs at a designated facility or collection point. You can check with your local waste management authority or visit websites such as Earth911 or RecycleNation to find out where you can recycle your bulbs.
Conclusion
Changing a Whirlpool microwave light is a simple and rewarding DIY project that can save you money and hassle. All you need are some basic tools and a new light bulb that matches your microwave model and location.
In this article, we’ve shown you how to change a Whirlpool microwave light step by step. We’ve also told you what type of light bulb you need and where to buy it. Plus, we’ve answered some frequently asked questions about Whirlpool microwaves and their lights.
We hope this article has been helpful and informative for you. If you have any questions or comments, feel free to leave them below. And don’t forget to check out our other articles on Presstocook.com for more tips and tricks on cooking and appliances.
Thanks for reading and happy microwaving! 😊