
Before we dive into the painting process, it’s crucial to understand some basic information about your KitchenAid mixer. The mixer’s outer shell is made of a zinc and aluminum alloy, known as Zamak, which is durable and accepts paint well.
However, it’s not as straightforward as just applying a coat of paint. The surface needs to be correctly prepared, you need the right type of paint, and you should also know how to safely disassemble and reassemble your mixer.

Before you start painting, it’s essential to disassemble your KitchenAid mixer properly. Not only will this make it easier to paint, but it will also protect the internal components from accidental damage. Here’s a step-by-step guide:

Once you’ve disassembled your mixer, you’ll need to prepare the surface. This process includes cleaning, sanding, and priming the mixer’s exterior to ensure the paint adheres correctly.
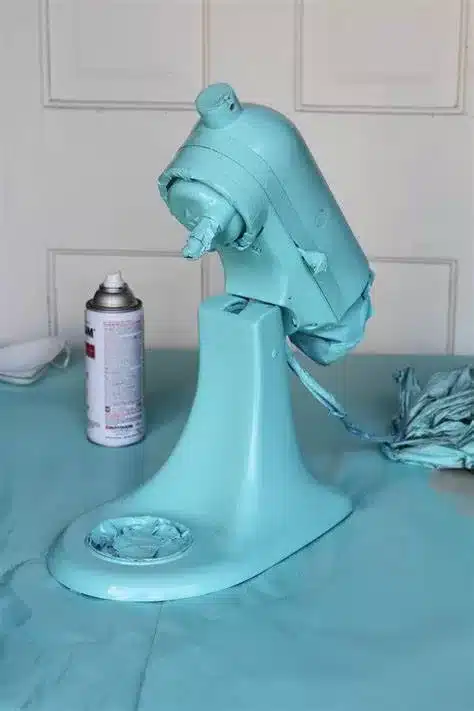
With the surface prepared, it’s time to paint. You can use either spray paint or a brush-on paint designed for metal surfaces. The key is to apply several thin coats, letting each coat dry fully before applying the next.
Once the paint and clear coat have fully dried, reassemble your mixer in reverse order of how you took it apart. Be sure to check that all parts are functioning correctly before using the mixer.

1. Can I use any type of paint on my KitchenAid mixer?
No, it’s best to use a paint designed for metal surfaces. Regular paint may not adhere correctly and can peel or chip over time.
2. How long does it take to paint a KitchenAid mixer?
The process can take several days to a week. This includes time for disassembly, surface preparation, painting, drying, and reassembly.
3. Is it safe to paint a KitchenAid mixer?
Yes, it’s safe as long as you correctly disassemble the mixer and protect the internal components. Always unplug the mixer before starting the project.
Painting your KitchenAid mixer is an excellent way to personalize this kitchen staple and match it to your unique style. With the right preparation and patience, you can transform your mixer into a custom piece that you’ll be proud to display on your countertop. Remember, the key to a successful paint job is proper surface preparation and using the right type of paint.

