
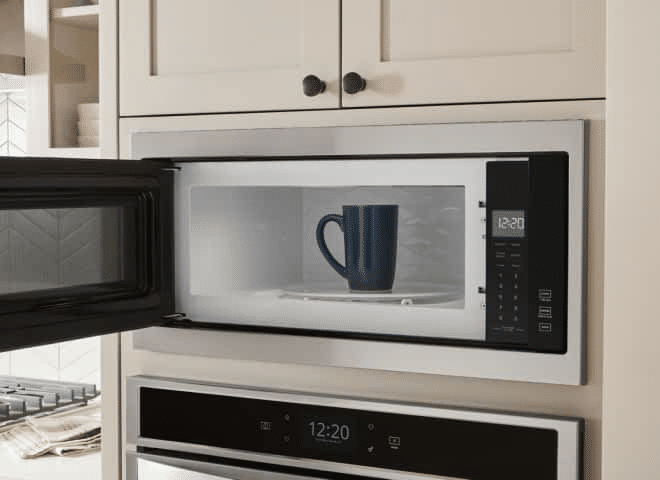
This process may vary slightly depending on the model of your microwave, but the general steps are similar for most Whirlpool microwaves. In this article, we will show you how to remove a built-in Whirlpool microwave safely and easily.
There are many reasons why you might want to remove a built-in microwave from your kitchen. Maybe you want to replace it with a newer or more efficient model, or maybe you want to free up some counter space or change the layout of your kitchen. Whatever your reason, removing a built-in microwave is not as hard as it may seem, as long as you follow some simple precautions and have the right tools.
Before you start removing your built-in microwave, make sure you have the following tools and materials ready:
You also need to wear safety glasses and protective clothing to avoid any injuries from sharp edges or hot surfaces.
Now that you have everything you need, let’s get started with removing your built-in Whirlpool microwave. Here are the steps you need to follow:
Gather all of your tools and safety gear. Put on your gloves and glasses and make sure you have a helper nearby who can assist you with lifting and holding the microwave.
For safety’s sake, you should shut down the microwave oven and unplug it from a power source. You can do this by either turning off the circuit breaker that controls the microwave outlet or by unplugging the cord from the wall socket. Make sure there is no power going to the microwave before you proceed.
Locate the mounting bracket that holds the microwave to the wall. It is usually located behind or above the microwave. You may need to remove some cabinets or trim pieces to access it. Look for screws or bolts that secure the bracket to the wall studs. You will need to unscrew them later.
Also, look for screws that hold the grill and the control panel of the microwave in place. They are usually located on the front or top of the microwave. You will need to remove them as well.
Using a Phillips head screwdriver, start by removing the screws that hold the grill of the microwave. Pull the grill forward from the top and set it aside.
Next, remove the screws that secure the control panel of the microwave. Carefully pull out the control panel and disconnect any wires or connectors that attach it to the microwave. Set it aside as well.
Using an insulated screwdriver, disconnect the power cord of the microwave from its terminal block inside the cabinet. Be careful not to touch any live wires or metal parts.
Also, disconnect the vent duct of the microwave from its outlet inside or outside the cabinet. You may need to use a flathead screwdriver or a putty knife to pry it loose.
Using a Phillips head screwdriver, remove the mounting bolts that secure the bottom of the microwave to the wall bracket. There are usually two or four bolts depending on your model.
Have your helper hold onto one side of the microwave while you hold onto another side. Carefully tilt down and slide out the bottom of the microwave from under the wall bracket.
With your helper’s assistance, lift off and carry away the microwave from its position on the wall. Be careful not to drop or damage it.
Place it on a sturdy surface such as a table or a counter.
Congratulations! You have successfully removed your built-in Whirlpool microwave!
If you have removed your old built-in Whirlpool microwave and want to install a new one, you need to follow some similar steps as above, but in reverse order. You also need to make sure that the new microwave is compatible with your cabinet opening and electrical supply. Here are the steps you need to follow:
Before you buy a new built-in Whirlpool microwave, you need to measure the cabinet opening where you want to install it. The opening should be at least 28 ½ inches wide, 17 ⅝ inches high, and 21 ⅞ inches deep. You also need to have 2 and 3/16 inches of clearance above the opening and 1 inch below. If your cabinet opening does not meet these requirements, you may need to modify it or choose a different microwave model.
The electrical supply for the new microwave must be 240V at 60Hz. A dedicated circuit is required. You also need to have a junction box inside or near the cabinet where you can connect the power cord of the microwave. If you are not sure about the electrical supply or wiring, contact a qualified electrician for assistance.
Some models of built-in Whirlpool microwaves come with a spacer kit that helps to fill the gap between the microwave and the cabinet opening. If your microwave has this kit, you need to assemble and install it before installing the microwave. Follow these steps:
Remove any packaging materials from your new microwave oven, as well as the glass tray, support and any other accessories, if applicable. Resting the appliance on a piece of cardboard, have an assistant help you to set the microwave on a cart or countertop adjacent to the cabinet opening.
WARNING: Electrical shock hazard. Disconnect power before servicing. Replace all parts and panels before operating. Failure to do so can result in death or electrical shock.
Before making any electrical connections, make sure the power supply to the junction box is turned off.
the Microwave
Using two or more people, align the microwave oven on the spacer bars, if applicable. Open the microwave oven door and push against the front frame of the oven to fully insert the appliance into the cabinet.
Confirm the appliance is centered, then use a 1/8 inch diameter drill bit to drill pilot holes through the mounting holes in the bottom trim of the microwave.
Use a Phillips head screwdriver to thread and tighten the self-aligning mounting bolts from your microwave installation kit through the pilot holes until they are snug against the bottom of the cabinet.
Avoid overtightening the bolts as this may damage the microwave or the cabinet.
Close the microwave oven door and check that it opens and closes smoothly.
Congratulations! You have successfully installed your new built-in Whirlpool microwave!
Removing and installing a built-in Whirlpool microwave is not a difficult task if you follow some simple steps and have the right tools and materials. However, if you are not confident about your skills or safety, you should always contact a professional installer or a qualified electrician for assistance. A built-in Whirlpool microwave can be a great addition to your kitchen, as it can save you counter space and provide you with fast and convenient cooking options. We hope this article has helped you learn how to remove and install a built-in Whirlpool microwave with ease. If you have any questions or comments, feel free to leave them below. And don’t forget to check out our website, Presstocook.com, for more tips and tricks on how to make the most of your kitchen appliances. Happy cooking!

