Pasta is a staple in many households. Store-bought pasta is convenient, but making your own pasta from scratch results in a fresher, more flavorful dish. With the right tools, making homemade pasta is easy and fun. If you own a KitchenAid stand mixer, using pasta attachments can streamline the process. In this beginner’s guide, we’ll walk through how to use KitchenAid pasta makers to create delicious homemade pastas.
Why Make Homemade Pasta?
While dry pasta from the store is an inexpensive pantry staple, there are a few advantages to making your own:
- Flavor – Fresh pasta has a tender texture and richer taste than dried pasta. Eggs and higher protein flour allow more flavor to come through.
- Texture – Homemade pasta has a softer, more delicate consistency. The textures of fresh pasta styles, like tagliatelle or ravioli, can’t be replicated in dried pasta.
- Fun factor – Making pasta is an enjoyable, hands-on activity for the whole family. Kids love getting creative with shaping different pasta styles.
- Control ingredients – You can use high-quality ingredients, like semolina flour or farm fresh eggs. Make pasta healthier by sneaking in veggies or alternate flours.
- Cost savings – While not as cheap as boxed pasta, making it at home costs just pennies per serving. The investment in a pasta maker pays for itself over time.

Pasta Attachment Options for KitchenAid
KitchenAid makes several attachments for mixing, kneading, rolling, and cutting homemade pasta dough. Here are the main types:
- Pasta Roller and Cutter Set – This set with a roller and cutter wheel can make lasagna noodles, spaghetti, fettuccine, and customized shapes.
- Ravioli Maker – This attachment presses pasta dough into ravioli or tortellini pockets ready for filling. Filled pasta in minutes!
- Spaghetti Press – A simple attachment that extrudes dough into long spaghetti strands or thin linguini noodles.
- Gourmet Pasta Press – Includes multiple plates for extruding bucatini, rigatoni, macaroni, fusilli, and more shaped pasta styles.
All pasta attachments fit all KitchenAid stand mixer models except the mini 3.5 qt mixer. The roller and cutter are manual attachments powered by the turn of a handle. The presses attach to the mixer’s power hub to automatically extrude pasta.
Making Pasta Dough with a KitchenAid
The first step is mixing and kneading your pasta dough. Here is a basic all-purpose pasta dough recipe by volume:
- 2 cups 00 or semolina flour
- 3 large eggs
- 1 tsp olive oil
- 1/4 cup water
You can use an all-purpose flour, but semolina flour adds extra texture and nutrients. Italians would consider it critical for authentic pasta!
Mix the eggs, oil, and water in the stand mixer bowl. Install the dough hook attachment. With the mixer running on low, slowly incorporate the flour 1/2 cup at a time until a shaggy dough forms. Knead on medium-high speed for 5-7 minutes. The dough will become glossy and pull away from the sides when ready. Add extra water or flour in small amounts if the dough is too wet or dry.
Let the dough rest wrapped in plastic for 30 minutes before rolling and cutting. This helps the gluten relax for an easier, more tender pasta.

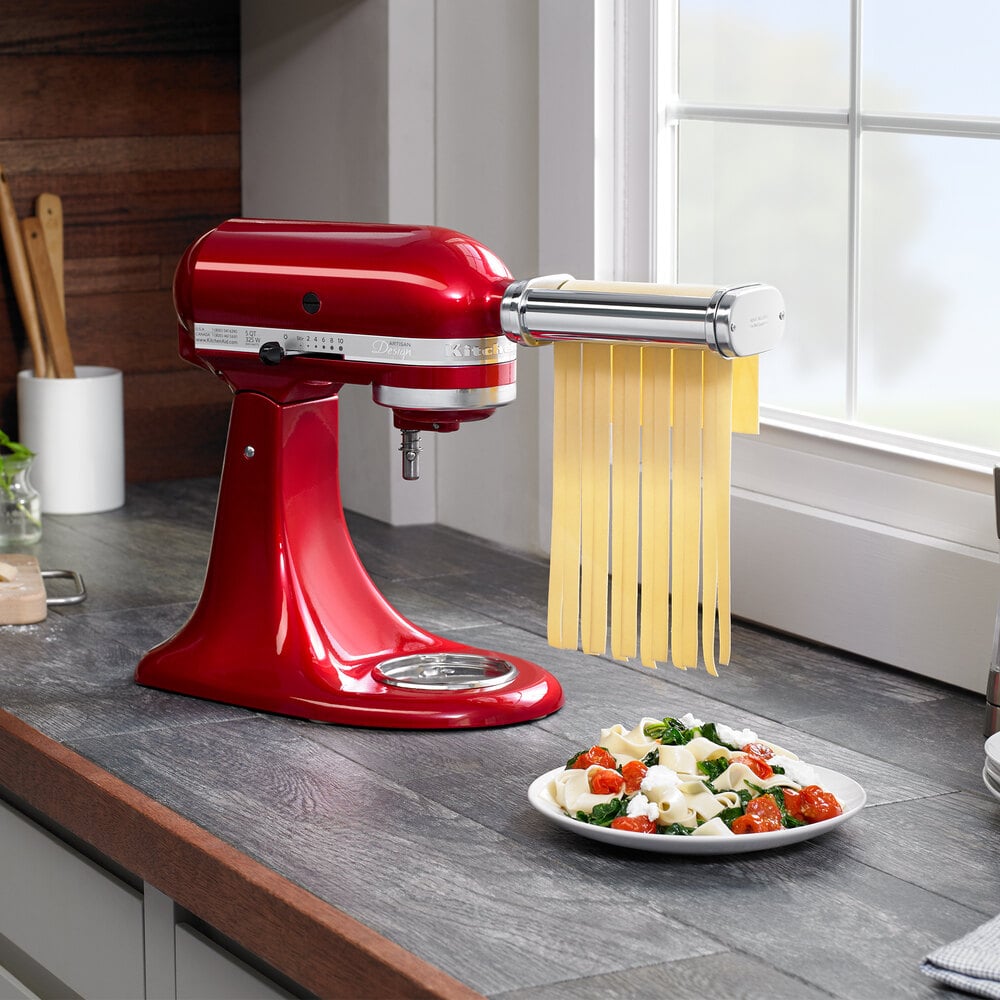
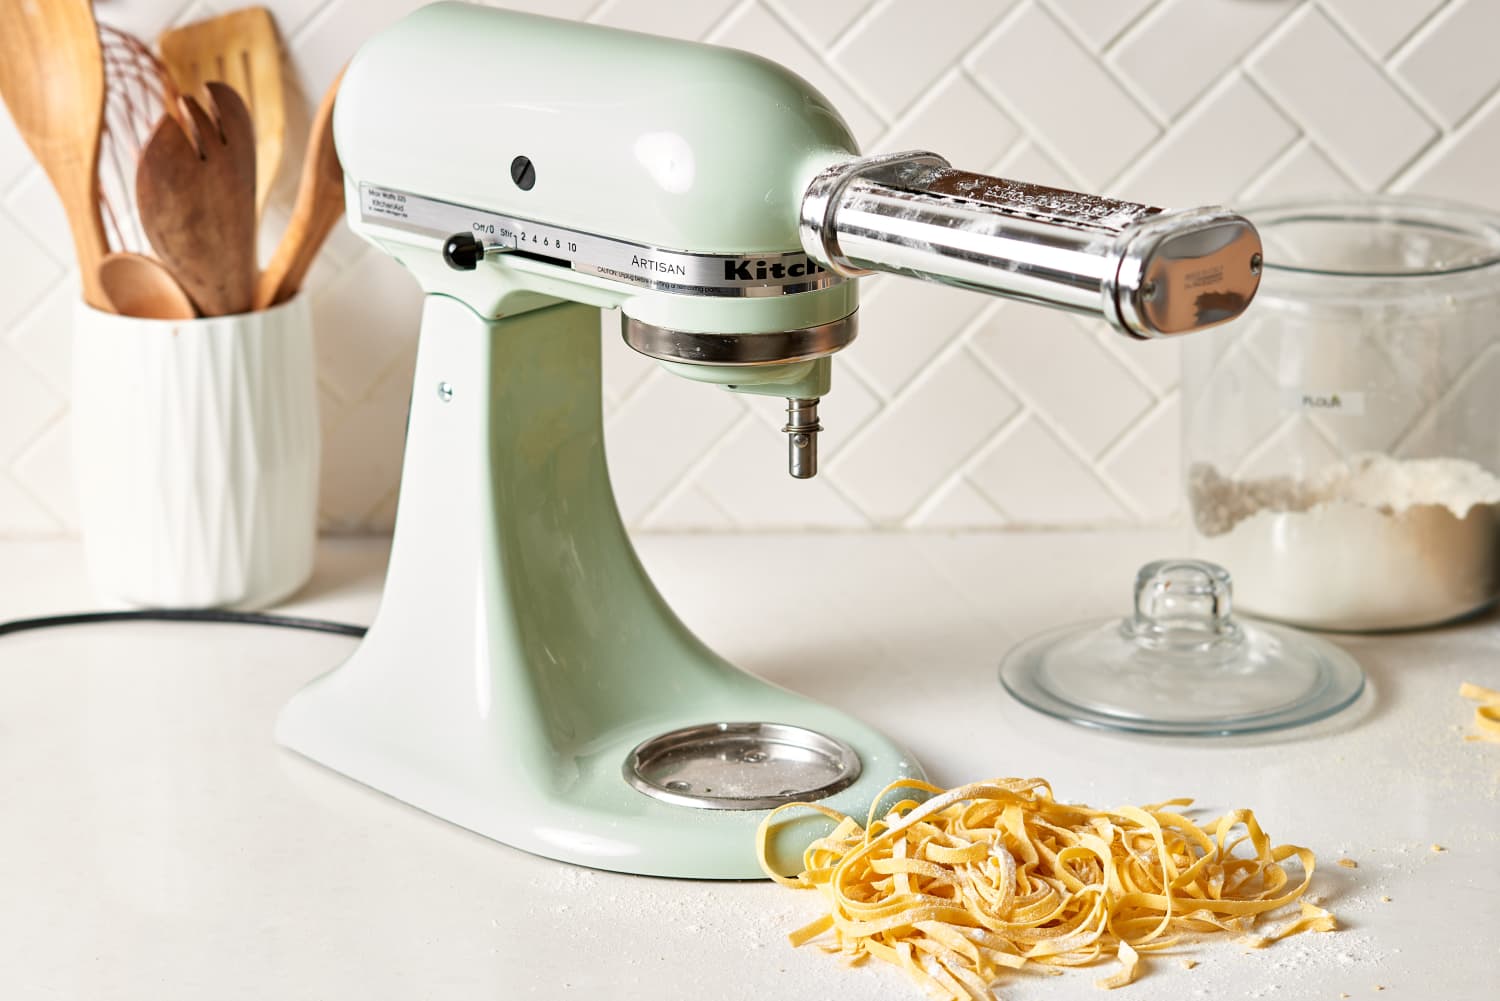
Rolling and Cutting Pasta Shapes
Once your dough has rested, it’s time to start shaping! This works best with the pasta roller and cutter attachment.
- Cut the dough into 4 equal pieces. Keep unused dough covered in plastic wrap.
- Flatten a piece into a rectangle and feed through the widest pasta roller setting. Fold and feed through again to knead.
- Roll successively thinner on each setting, folding every other pass, until lasagna thinness is reached on the thinnest setting. Repeat with the remaining dough balls.
- Switch to the cutting attachment. For lasagna noodles, use the flat sheet cutter. For spaghetti, attach the thin noodle cutter. Or get creative with the fettuccine or customized shape cutters!
- Lay noodles out on parchment paper and add sauce or freeze for later.
Tip: Only pass dough through the cutters once for tender texture. Let noodles rest before boiling or freezing.
Making Filled Pasta with a Ravioli Maker
For homemade ravioli, tortellini, or other filled pastas, the ravioli maker attachment speeds everything up.
- Roll out pasta dough thin enough to see your hand through, around setting 5-6. Cut into long 3-4 inch strips.
- Place a strip into the ravioli maker and add spoonfuls of filling down the center. Top with another pasta strip and press the handle to seal. For tortellini, cut circles instead of strips.
- Trim around the edges with a sharp knife or pizza cutter and separate into individual pieces.
- Finish by boiling ravioli for just 2-3 minutes until the pasta is tender. Then toss with your favorite sauce!
Filled pasta freezes very well. Simply arrange ravioli in a single layer on a parchment-lined baking sheet. Freeze, then transfer to a freezer bag. Boil frozen ravioli straight from the freezer.
Shaping Pasta with a Press Attachment
Pasta presses make short work of shaped styles like spirals, tubes, and ridges. Follow the same dough prep steps, then:
- Cut dough into golf ball-sized pieces and keep covered.
- Install the press attachment onto the power hub of the mixer. Insert the desired shaping plate.
- Feed a dough ball into the top and let the press extrude the pasta shape directly into boiling water or onto a baking sheet.
- Cut extruded pasta to desired lengths with kitchen shears before cooking.
- Repeat with remaining dough, keeping the shaped pasta floured to prevent sticking.
Voila! You can now enjoy homemade spaghetti, rigatoni, rotini, and more with that satisfying al dente bite.
Pasta Maker Care and Cleaning
With a few care tips, your KitchenAid pasta attachments will deliver years of service:
- Wipe surfaces clean after each use using a soft cloth. Don’t submerge in water or use abrasive cleaners.
- Avoid overworking the dough, which can strain the motor and cause overheating.
- Dust the rollers, cutters, and press plates with flour or semolina to prevent sticking.
- Adjust the pasta thickness knob gently – forcing it can damage the gears.
- Store attachments in a dry place to prevent moisture damage.
Follow the pasta dough recipes in the instruction booklet to match your mixer model’s capabilities. Making pasta at home is so rewarding when you have the right tools. KitchenAid pasta attachments take the hassle out of shaping homemade pasta. With a little practice, you’ll be stocking the freezer with fresh pasta to enjoy for weeks.

Frequently Asked Questions
What can I do if my pasta dough is too sticky?
If your pasta dough is sticking to the rollers, dust it lightly with flour. You can also lightly flour the rollers. A sticky dough usually means it needs a bit more flour and kneading time.
How do I prevent pasta dough from getting too dry?
If your pasta dough becomes dry and cracked, mist it with water and knead briefly to incorporate. You can also wrap it in plastic wrap and let it rest for 15 minutes to allow gluten to relax.
What thickness should I roll pasta dough for different shapes?
For flat pasta like lasagna or fettuccine, the thinnest setting (1) works best. For filled pasta like ravioli, around setting 5-6 allows pasta sheets thin enough to see through. For extruded pasta, thicker settings like 3-4 help the dough hold its shape.
Wrapping Up
Making fresh pasta at home lets you control the ingredients and textures precisely how you like them. While it takes practice, using pasta attachments for your KitchenAid stand mixer streamlines the process considerably. In no time, you’ll be impressing dinner guests with restaurant-quality pasta made completely from scratch. Troubleshoot any sticking or texture issues by adjusting flour, water, and kneading as you gain experience. Homemade pasta is a rewarding and tasty culinary adventure!


