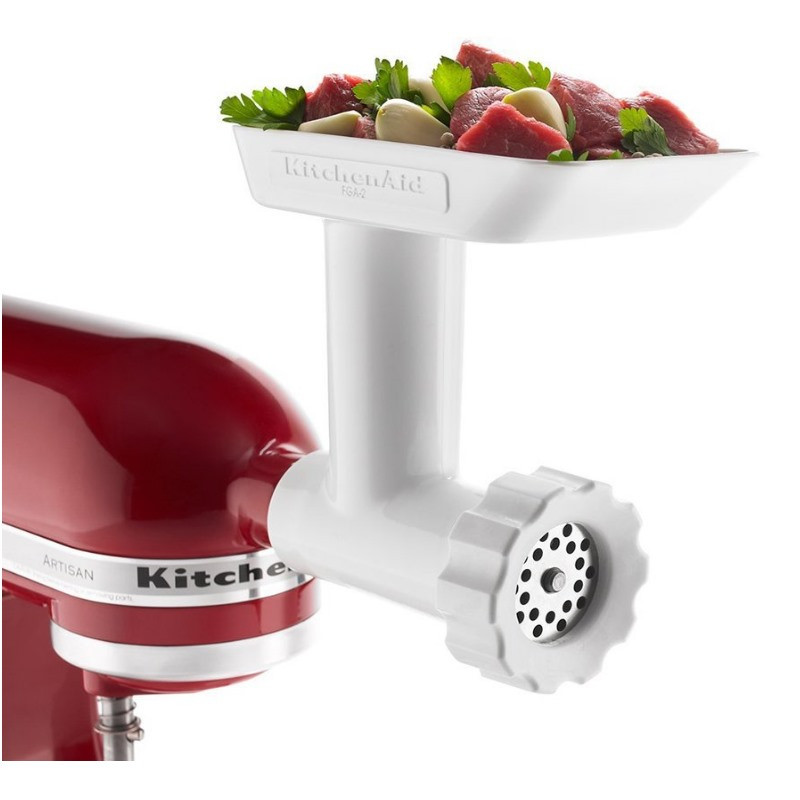
The first key step is properly assembling the grinding assembly. Here are the main components and how to put them together:
Align the feed screw, grinding plate, and knife. Insert them into the grinder housing. Lock the housing into the power hub of the mixer. The grinder must be completely locked to operate safely.

Meat must be thoroughly chilled before grinding to prevent smearing or clogging the grinder. For best results, meat should be partially frozen to around 25°F to 30°F. Cut meat into 1-2 inch cubes before chilling for faster freezing. Chilled fat should also be cut into small cubes and mixed with the ground meat for added moisture and flavor.
Once assembled and with chilled meat, you’re ready to grind. Turn the mixer speed to the lowest setting to start. Feed cubes of meat evenly into the grinder tube. Use the food pusher to apply gentle pressure, allowing the screw to pull the meat in. If meat smears against the end of the tube, slow the speed.
When finished grinding, remove the metal grinding parts. Do not pass meat through the grinder a second time as this can lead to a dense, rubbery texture.

One benefit of home grinding is the ability to add seasonings directly to the meat. To do this, detach the knife and grinding plate once the meat is ground. Then re-attach just the assembled feed screw and housing.
Place herbs, spices, or other dry ingredients into the meat grinder tube. Grind them at a slow speed while using the pusher. These seasoned “crumbs” get evenly dispersed when mixed into the fresh ground meat.
With the grinder attachment, you can make your own sausages from fresh ground meat. Simply prepare a sausage mixture and chill thoroughly. Grind the sausage mixture through the machine using a sausage stuffing horn attachment on the end. Twist into links as the sausage emerges from the horn. Pan fry, grill, or smoke the sausages to perfection.
After each use, disassemble the grinder attachment and wash thoroughly. Use a grill brush to scrub the grinding plate and a bottle brush for the screw and housing tube. The knife and plate are also dishwasher safe. Proper cleaning prevents residual fat and meat from gumming up the works.
With these tips, you’ll get professional-quality results from your KitchenAid meat grinder. Grind meat at home to save money and customize textures and flavors. The grinder makes quick work of even large batches of meat. Follow this guide for assembling, grinding, stuffing, and cleaning to get the most out of this versatile mixer attachment.

What meats can I grind with my KitchenAid grinder?
You can grind all types of raw meats including beef, pork, chicken, turkey, lamb, and wild game. Partially freeze meat first for an optimal texture.
How can I get a finer texture from my ground meat?
Use the fine grinding plate rather than the coarse one. Chill meat thoroughly so it moves through the grinder cleanly. Grind just once to avoid a dense texture.
What’s the best way to clean the meat grinding parts?
Disassemble and hand wash all components in hot soapy water after use. Use bottle brushes to thoroughly scrub interior pieces. Avoid leaving any residue which can spoil.
Conclusion
With some practice, the KitchenAid meat grinder can produce impressive results rivaling butcher shops. Just remember to fully chill meats prior to grinding. Assemble the components properly and grind meat only once for the best texture. Clean thoroughly after each use to maintain top performance. Follow this guide to get professional-quality ground meat and homemade sausages from your mixer attachment.
